Create a Hello World Extension
After reading this topic, you will get:
how to initialize a project for extension development.
how to launch the KubeSphere web console in your local environment.
how to debug an extension.
Prerequisites
A development environment is ready. For more information, view Build a Development Environment.
KubeSphere adopts React for the frontend development of extensions. For more information, visit React official website.
Initialize a project for extension development
Initialize a project for extension development:
mkdir -p ~/kubesphere-extensions
cd ~/kubesphere-extensions
yarn add global create-ks-project
yarn create ks-project ks-console
The project contains a KubeSphere web console that can run locally.
Create a Hello World extension:
cd ks-console
yarn create:ext
Configure basic information, for example, the extension name, alias, description, author, and language.
Extension Name hello-world
Display Name Hello World
Description Hello World!
Author demo
Language JavaScript
Create extension [hello-world]? Yes
The following directory is generated:
kubesphere-extensions
└── ks-console                   # Extension frontend development directory
    ├── babel.config.js
    ├── configs
    │   ├── config.yaml
    │   ├── local_config.yaml               # Configuration file of the KubeSphere web console
    │   ├── webpack.config.js               # Scaffold Webpack configuration file
    │   └── webpack.extensions.config.js    # Webpack configuration file for packaging extension frontend
    ├── extensions               # Source code directory for the extension
    │   └── hello-world          # Source code directory for the Hello World extension
    │       ├── Dockerfile
    │       ├── README.md
    │       ├── package.json
    │       └── src
    │           ├── App.jsx
    │           ├── index.js
    │           ├── locales
    │           └── routes
    ├── package.json
    ├── tsconfig.base.json
    ├── tsconfig.json
    └── yarn.lock
Configure the KubeSphere web console
To make the KubeSphere web console run locally, you need to Build a Development Environment, and get the address of the KubeSphere API server.
Then, make configurations in the local_config.yaml file as below.
server:
  apiServer:
    url: http://172.31.73.3:30881  # IP and port of `ks-apiserver`
    wsUrl: ws://172.31.73.3:30881  # IP and port of `ks-apiserver`
Launch the KubeSphere web console and load the extension
Launch the KubeSphere web console in your local environment:
yarn devOpen a browser, visit
http://localhost:880, and use the default usernameadminand passwordP@88w0rdto log in to the KubeSphere web console.The entry of
Hello Worldappears on the top navigation bar. ClickHello Worldto open the page.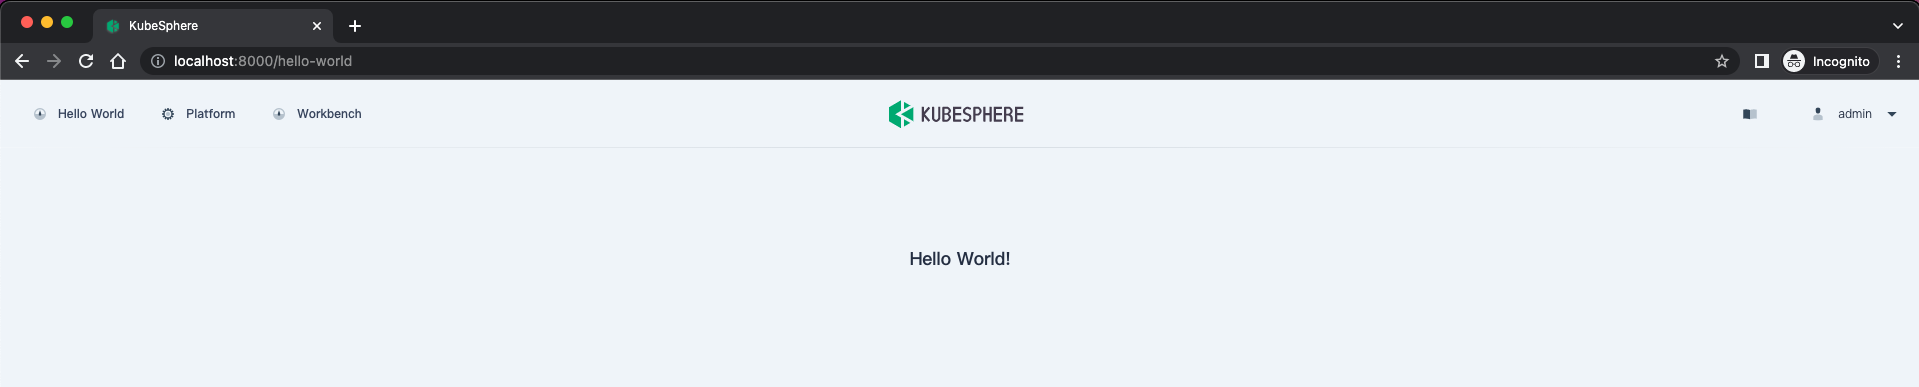
Debug the extension
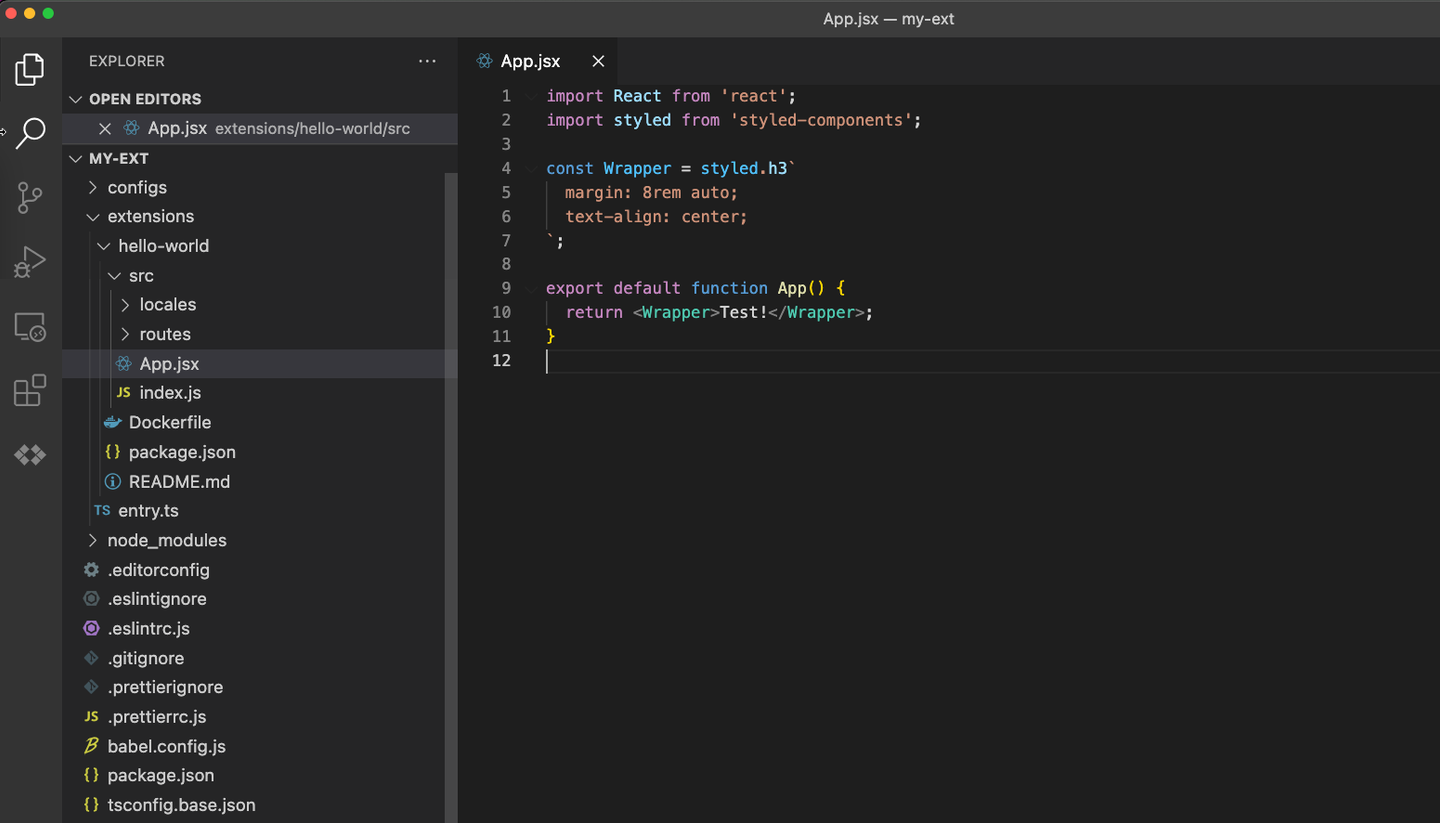
The source code of the Hello World extension is stored in ~/kubesphere-extensions/ks-console/extensions/hello-word/src.
You can change the string displayed on the page to Test!, as shown in the following figures:

Learn more
The demo extension only contains the frontend part, showing the basic features of extensions. For more development examples, please refer to Development Examples.