扩展组件开发案例
本节将简要介绍如何开发扩展组件,包括环境准备、扩展组件初始化、集成场景、打包发布、访问控制等方面,并提供 KubeSphere API 和 FAQ 供您参考。
环境准备
准备 Kubernetes 集群
KubeSphere Luban 在任何 Kubernetes 集群上均可安装。建议使用 KubeKey 快速部署 K8s 集群。
➜ curl -sfL https://get-kk.kubesphere.io | sh -
./kk create cluster --with-local-storage  --with-kubernetes v1.25.4 --container-manager containerd  -y
安装 KubeSphere Luban
➜ helm upgrade --install -n kubesphere-system --create-namespace ks-core https://charts.kubesphere.io/main/ks-core-1.1.3.tgz --debug --wait可以使用 nip.io 或者泛域名解析为扩展组件自动配置访问入口。
--set extension.ingress.ingressClassName=<your-ingress-class-name>\
--set extension.ingress.domainSuffix=<your-node-ip>.nip.io \
--set extension.ingress.httpPort=<your-ingress-controller-http-port> \
--set extension.ingress.httpsPort=<your-ingress-controller-https-port>
配置连接
复制 K8s 集群的 kubeconfig 配置文件到开发主机的
~/.kube/config,确保可以使用 kubectl 正常访问 K8s 集群。➜ kubectl -n kubesphere-system get po NAME READY STATUS RESTARTS AGE ks-apiserver-7c67b4577b-tqqmd 1/1 Running 0 10d ks-console-7ffb5954d8-qr8tx 1/1 Running 0 10d ks-controller-manager-758dc948f5-8n4ll 1/1 Running 0 10d安装 ingress 控制器
手动安装一个 ingress 控制器,默认设置为 NodePort 模式,端口 30888,在您熟悉整个流程前,建议不要调整。
➜ helm upgrade --install ingress-nginx ingress-nginx \
--repo https://kubernetes.github.io/ingress-nginx \
--namespace ingress-nginx --create-namespace \
--set controller.service.type=NodePort \
--set controller.service.nodePorts.http=30888
初始化扩展组件
下载最新的 ksbuilder 工具。
使用一个已制作好的 chart 包,或者生成一个示例 chart 包。
➜ helm create demo
➜ helm package demo
# Successfully packaged chart and saved it to: /Users/inksnw/Desktop/demo-0.1.0.tgz
➜ rm -rf demo
创建扩展组件。
# --from 添加上文中的 chart 包
➜ ksbuilder createsimple --from=./demo-0.1.0.tgz
推送组件安装包到集群。
➜ ksbuilder publish demo
publish extension demo
apply resources to k8s cluster
creating Extension demo
creating ExtensionVersion demo-0.1.0
creating ConfigMap extension-demo-0.1.0-chart
在扩展市场查看刚提交的组件。

点击安装扩展组件。
extSvcName为您应用 ui 的 svc 名称与端口,这些参数可以交由使用者配置,也可以不放在最外层的参数中。
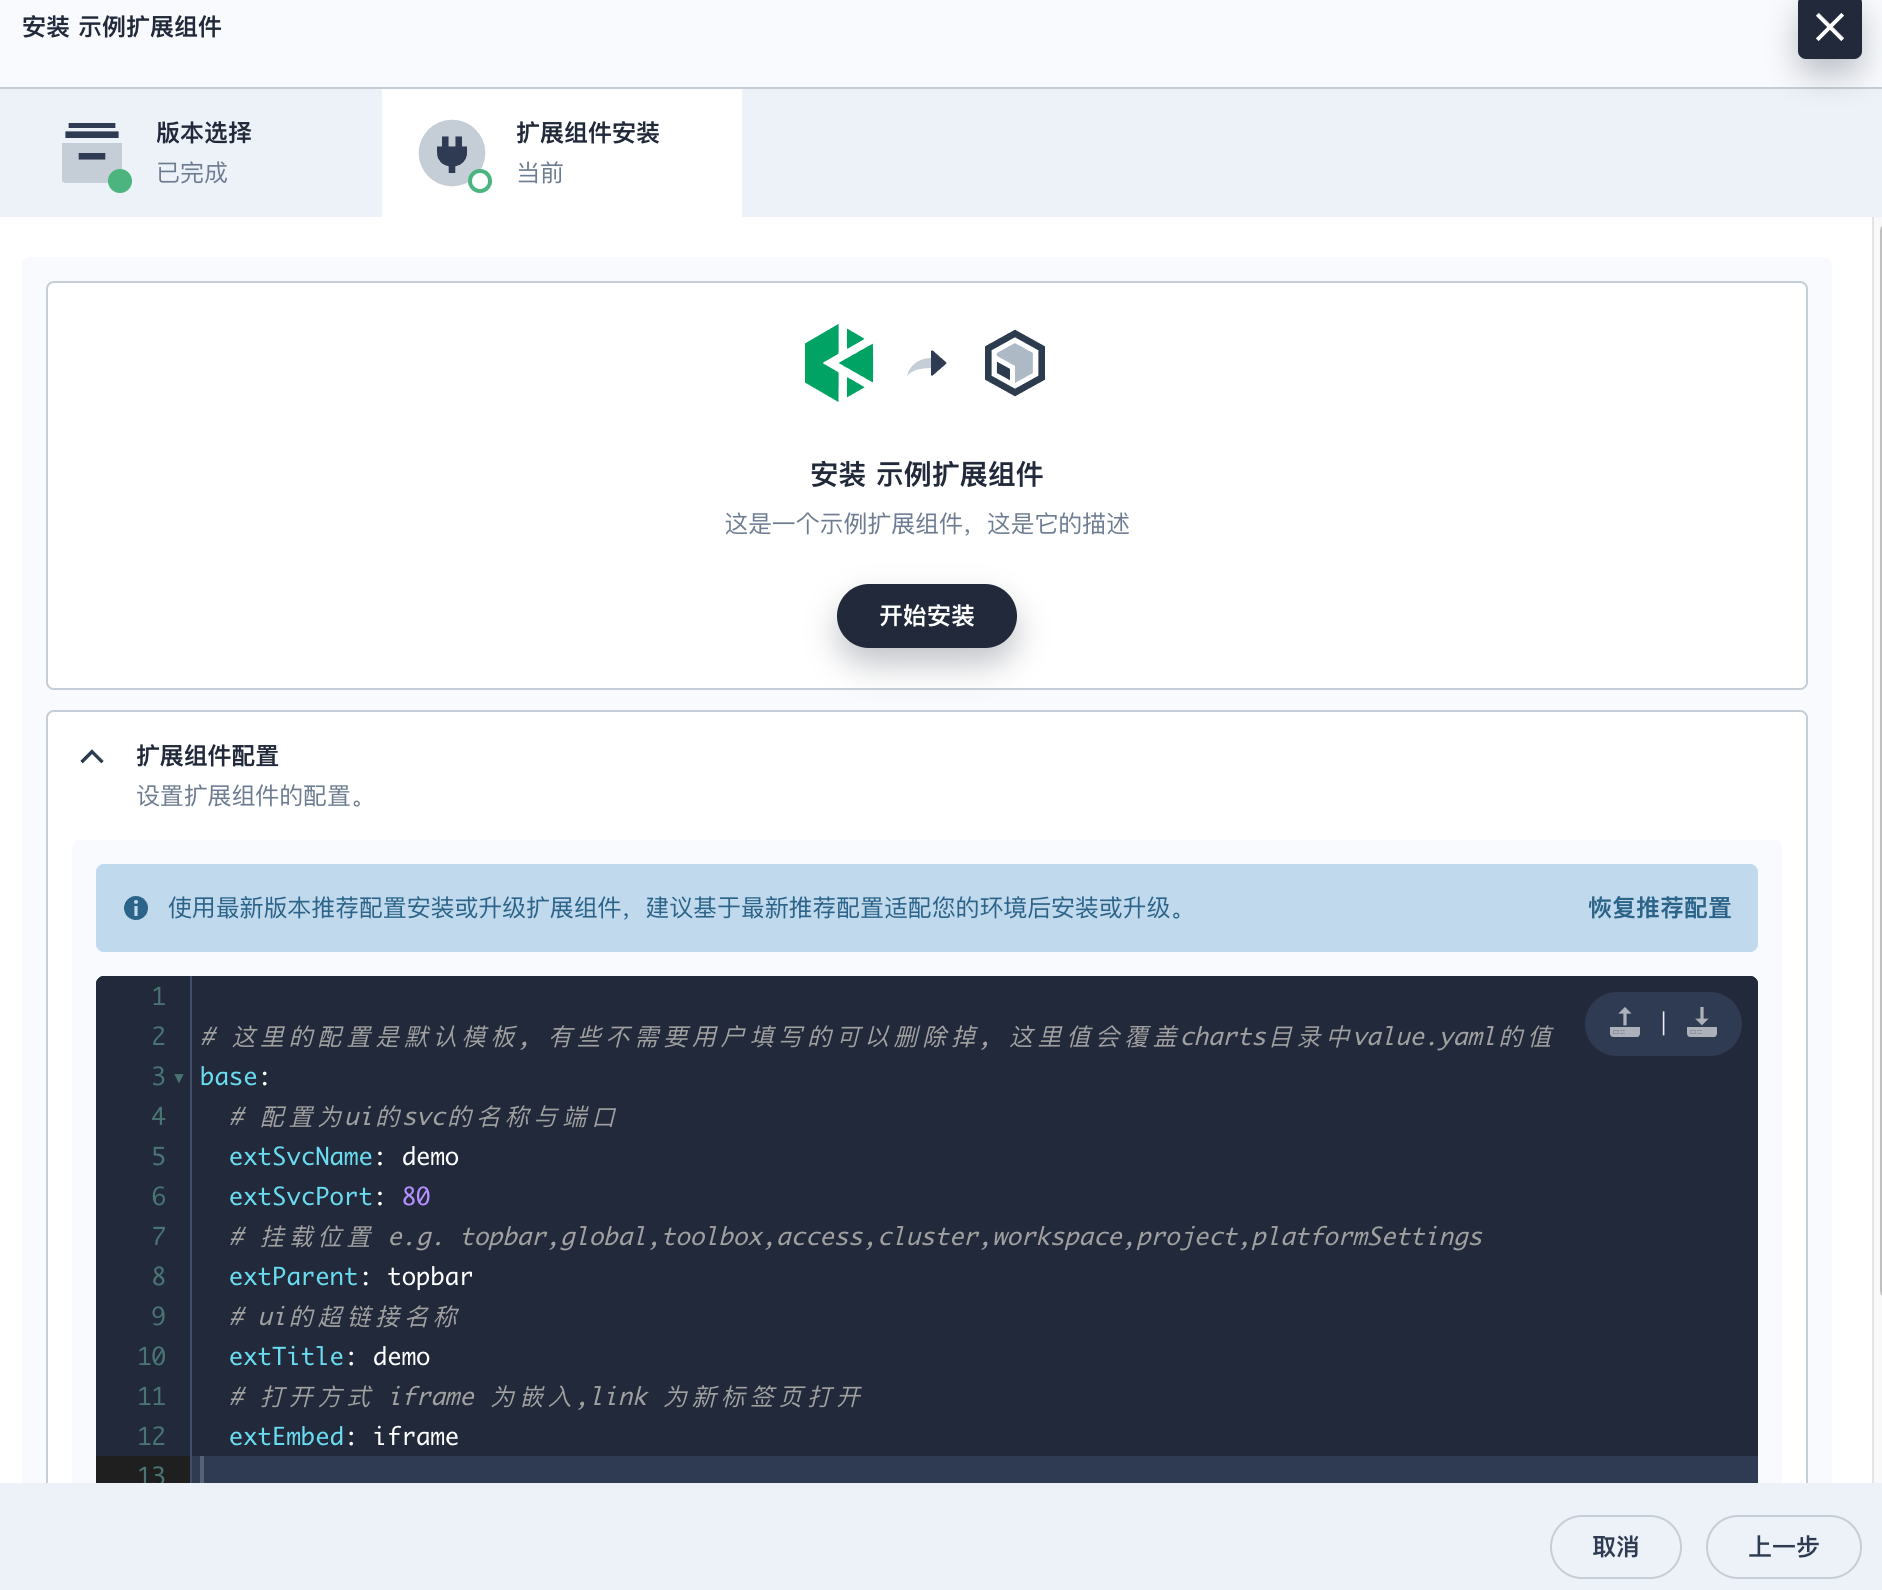
安装完成后,点击页面左上角的 demo,验证扩展组件是否正常运行。
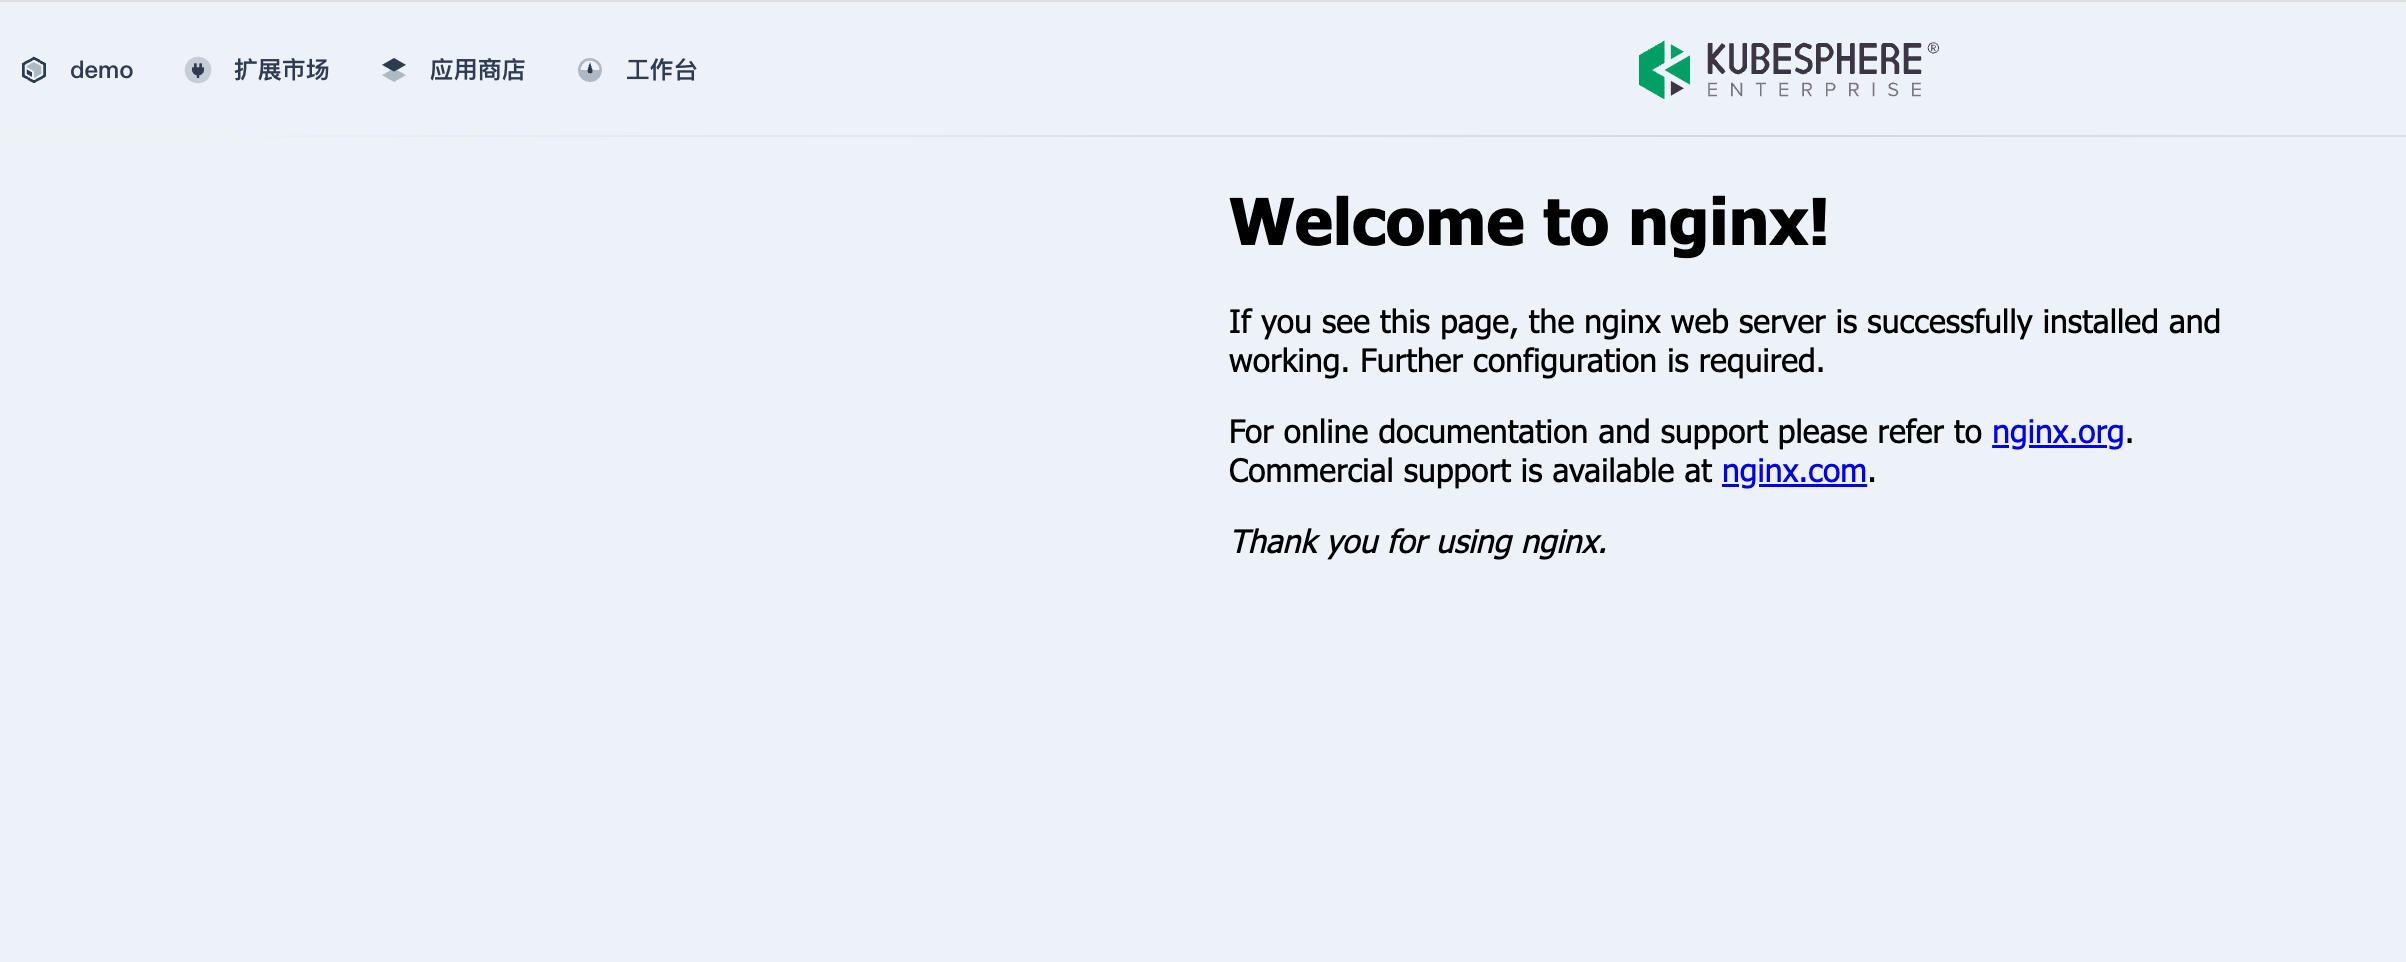
验证
demo为 chart 包的名字,即chart.yaml中的name字段。
域名方式
安装后, 您可以访问以下示例地址验证:
- http://demo.www.ks.com:30888/ 验证子域名解析是否正常
- http://www.ks.com:30880/pstatic/dist/demo/index.js 验证前端 js 代理是否正常
nip.io
- http://demo.192.168.50.208.nip.io:30888/ 验证子域名解析是否正常
- http://192.168.50.208:30880/pstatic/dist/demo/index.js 验证前端 js 代理是否正常
发布
如何发布扩展组件到扩展市场,请参阅发布扩展组件。
oauth 对接
代码示例
创建
OAuth Client配置。cat << EOF | kubectl apply -f - apiVersion: v1 stringData: configuration.yaml: | name: test secret: fake grantMethod: auto scopeRestrictions: - 'openid' - 'email' - 'profile' redirectURIs: - http://10.8.0.2:5556/auth/google/callback kind: Secret metadata: name: oauthclient namespace: kubesphere-system labels: config.kubesphere.io/type: oauthclient config.kubesphere.io/oauthclient-name: kubesphere type: config.kubesphere.io/oauthclient EOF使用示例代码,可参考此代码。
访问
10.8.0.2:5556将触发登录,登录后再次访问10.8.0.2:5556,您将能够获取到 OAuth 信息。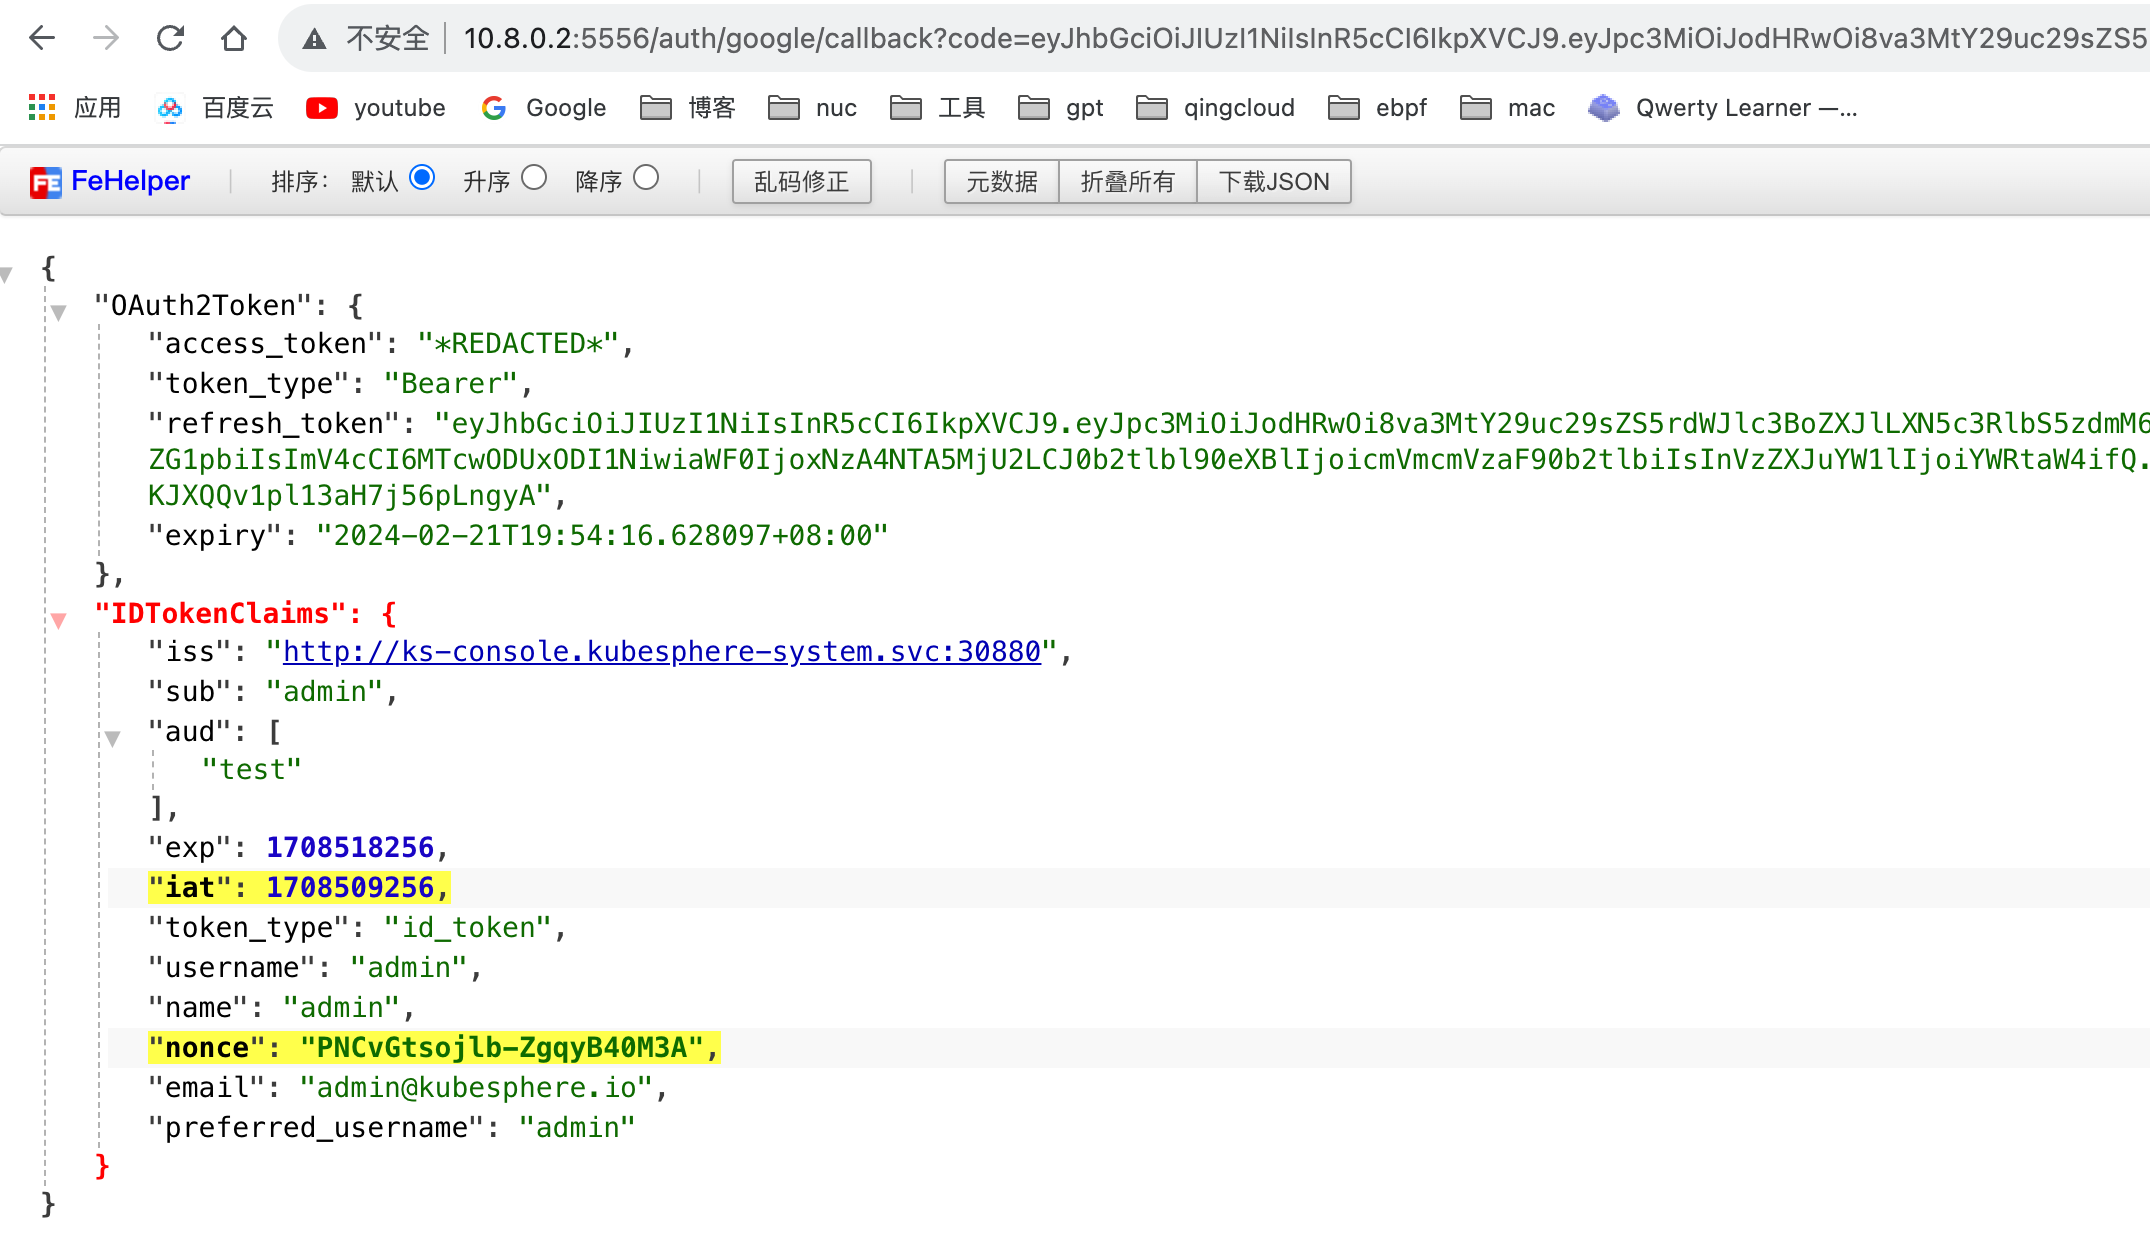
注意:
Secret 的配置中,
name和secret要与代码中的clientID和clientSecret一致。回调地址要一致。
oidc.NewProvider(ctx, "http://ks-console.kubesphere-system.svc:30880")中的 url 被配置在kubectl get cm -n kubesphere-system kubesphere-config的authentication.issuer.host下。如果您的程序并不在 k8s 中,需要将此 URL 修改为实际地址。在本地调试时,可以通过配置 hosts 文件实现,而无需修改。root@m1:~# kubectl get cm -n kubesphere-system kubesphere-config -o yaml apiVersion: v1 data: kubesphere.yaml: | authentication: authenticateRateLimiterMaxTries: 10 authenticateRateLimiterDuration: 10m0s loginHistoryRetentionPeriod: 168h multipleLogin: true issuer: host: "http://ks-console.kubesphere-system.svc:30880" ... kind: ConfigMap metadata: name: kubesphere-config namespace: kubesphere-system cat /etc/hosts 192.168.50.218 ks-console.kubesphere-system.svc
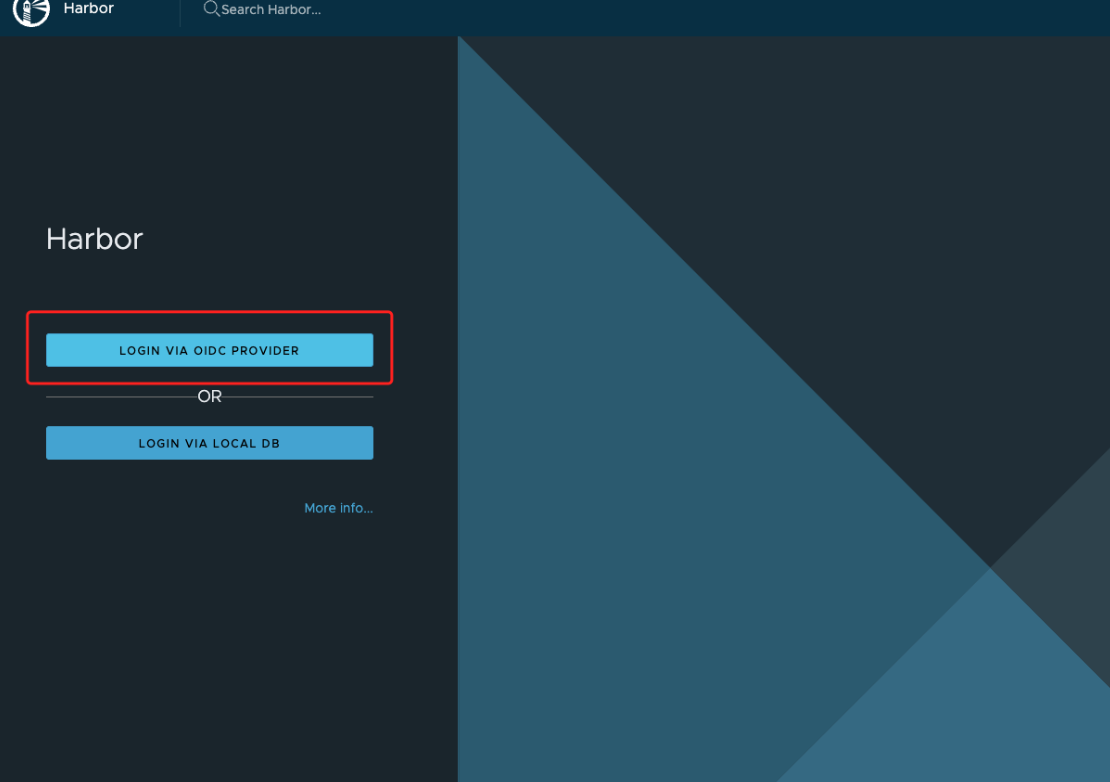
Harbor 示例
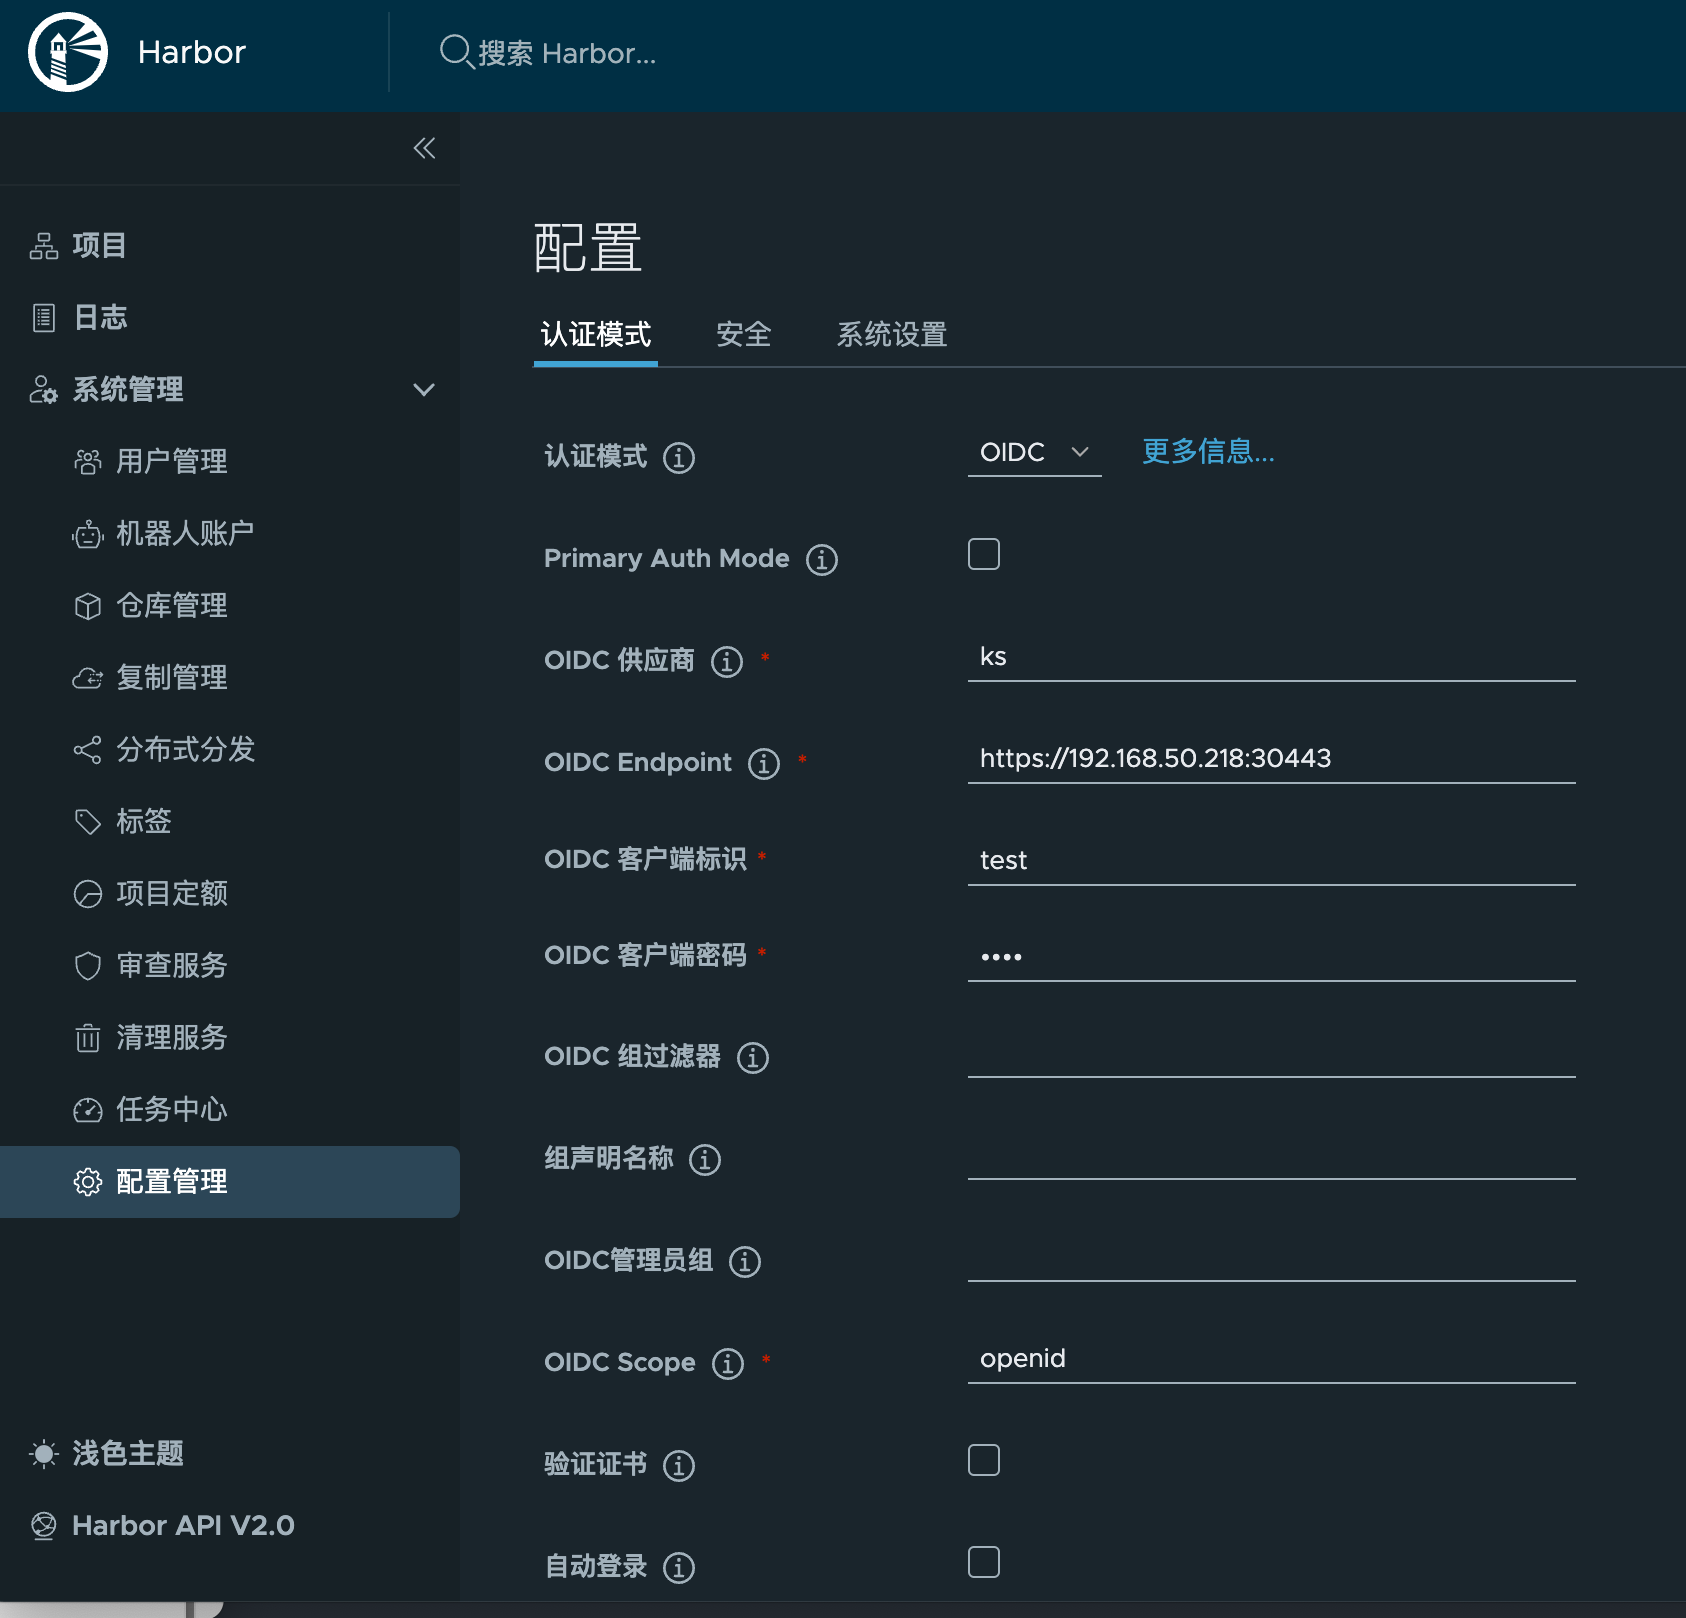
配置 Harbor 使用 OIDC 登录。
注意: Harbor 要求使用
https,因此需要为 KubeSphere 的 web 配置 https (操作略),并修改上述authentication.issuer.host为实际地址。
通过 OIDC 登录 Harbor。
Q&A
Q: 安装扩展组件时是否需要特定的存储,如 SSD?
A: 扩展组件是一个 helm 包,所以可以自行设置存储类型变量,让用户在安装时手动修改。
Q: 扩展组件有 UI 界面,如自带一个监控面板,如何暴露?
A: 使用标准的 k8s svc 暴露方式自行进行暴露,暂时没有提供直接的 UI 入口。
Q: 如何使用工单系统和信息推送系统?
A: KubeSphere 实现了多种 IM/邮件等平台的对接,您可以调用 KubeSphere API 来实现。
Q: 是否存在用于遥测扩展组件运行状态的 API?
A: 暂时没有。